***** ALERT - Nominations for your new ClubCJ Committee can be made here *****

*CLOSED* Body Kit (V&C F-Lip + Evo Bump/Fender) Group

For all ClubCJ Members.

Moderator: Senior Moderators

Dummer

Postby Dummer » Sun May 24, 2009 7:55 pm

Ok I got to fitting the Evo X style bumper piece.

The paint finish was scratched and due to the paint used I had to use paint strippers to take it off. This then showed why they had used that paint as the surface underneath was scratched and crap. So today went and got some putty to fill it up which improved it but wasn't 100% happy. Painted it up and then cut out the holes in my bumper. Put it up and realised there was no way it was going to fit due to a lip at the top of the lip :? (It definitely isn't in the picture in Ozie's how to). I did my best to reduce this but the material is shit to work with, lined it up only to find the the bottom of the bumper piece doesn't follow the contour's of my cars bumper and bulges out in the middle. Due to the rigidity of the material and it's wrong design there is no way the glue strips will hold it down and atm I have it held on by 6 cable ties so that I dont have two gaping holes in the bumper.

The Vox Motorsports one says it's made of ABS plastic and this one is more like a fibre glass so the dealer has something to answer for when he claims his products are just as good as the Vox stuff.

I'm just really pissed off that I cut into my bumper as no i have two gaping holes and a crap bumper piece only holding on by cable ties :?

Unless the dealer is going to do something about it and get a decent replacement looks like I am going to have to source a Vox motorsports one..

Dummer

Postby Dummer » Mon May 25, 2009 7:51 am

**bump for ofey**

Must say at a distance looking at it this morning it looks awesome, then you get up close and notice that it doesn't fit the bumper properly and is held on by the cable ties... :(

User avatar
ofey
Alumni
Alumni
Posts: 8582
Joined: Mon Oct 27, 2008 8:56 pm
Location: Melbourne, VIC, Australia
Contact:

Postby ofey » Mon May 25, 2009 8:11 am

First up Ryan, I'm sorry about the problems you've faced but I think what we need are pictures. Even if you want me to take the case up with the dealer, we need to see pictures. IF the problem was so terrible i.e. the scratches and stuff, you should have taken pictures of these to document it. If it didn't align properly, you should have documented this to show the part wasn't contoured to suit. As with the guys with the cracked C-Lips, they took pictures of the cracks and instantly informed the dealer.

I'm sure both your part and Ozies are the same part. The only parts which had different suppliers sent out were the C-Lips which is what caused a mess BUT the dealer in his defence has sorted that bit out.

My C-Lip was badly scratched up as well. I didn't strip their original paint though but simply sanded it down with 800 before priming. Followed with more sanding and priming before painting.

Pesonally, I don't see how you need cable ties and I'm sure the pictures will help us all see what the problem you're describing is.
Beeble tooned MY08 OEd. w/ RA BKit+SWheel
Cosworth Panel Filter w/ RA Intake | SuperCircuit 4-2-1 Headers | Creat’d Ti-tipped SS exhaust
BC BR-type Coilovers | UR + Whiteline Bars
EBC GreenStuff Pads | RDA Rotors

Dummer

Postby Dummer » Mon May 25, 2009 8:52 am

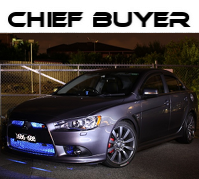
When I get home I'll get my DSLR out to take pics, was too dark last night to get the pictures taken.

Yeah I tried painting over it, but the rubberised paint they've used didn't like the acrylic on top of it and it buggered up so it had to get stripped off and I assumed this would reveal a smooth plastic surface that I could paint to the same flat black as the C lip. The C lip wasn't really painted and if it was it wasn't the same stuff on the Evo X bumper piece, so I had no trouble painting the centre lip.

I assumed that once I had taken the paint off and repainted it myself I'd have no worries fitting it and it seemed to line up alright (but as you know the only way to know this will fit for sure is if there are holes cut out).

Because the bumper piece is too straight and the fibre glass they've used is so rigid and with limited flexibility it wont follow the curvature in the bumper and as a result there is no way a skinny piece of 3M tape is going to hold it down so it needed cable ties around it to secure it down.

Given I had two ugly holes in the bumper I didn't really want to wait around for the dealer's response and having my car looking like an eyesore so I had to try make it fit (and in ozie's DIY I am assuming they are using the Vox one and it definitely didn't have this lip which was stopping me from getting the top to sit flush) so in the end I realised once the bottom still bulged out it was never going to fit and to just cable tie it for the time being and see what the dealer has to say...

At the end of the day the dealer (and dont get me wrong ofey i don't blame you and know how much you put into these group buys :) ) has to answer why he is shipping out fibreglass rubbish and claims its the same quality as the Vox which are apparently ABS plastic (and hence I'd be assuming injection moulded, which imo is a better yet dearer process). That's one reason I prefer Shadow's Evo X wing is that its a quality made injection moulded plastic and not fibre glass like the local bodykit makers do...

Also this guys name is Rick yeah?? Because I've noticed someone has popped up on the US ebay selling these products from Singapore so I'm assuming it's this guy...

User avatar
ofey
Alumni
Alumni
Posts: 8582
Joined: Mon Oct 27, 2008 8:56 pm
Location: Melbourne, VIC, Australia
Contact:

Postby ofey » Mon May 25, 2009 10:12 am

Wow you've really had loads of problems I see!

First off, I have to say I'm out of the loop when it comes to your bumper nose since I don't have one I can't ascertain what you're saying. Only Ozie bought one and rick (the dealer) can say something about it.

Here's what i think:

a) You would have to prime any surface prior to painting. Sand - Prime then paint. You can't just paint over another paint or an unprimed surface unless you're graffitiing a wall... .

b) I didn't go the same way as you. I test fitted the lip first prior to painting. I used masking tape to tape down and check the alignment. Because it's fibreglass, I used a heat gun to heat the places where I needed it to bend more or less. Once fibre glass heats up, you can adjust the curvature little by little. I would have fitted the nose first prior to cutting the holes. I think Ozie did that too?

I have sent Rick your comments and I have to wait and see what he has to say.

Further I have to add, that I don't see many complaints about his stuff from anywhere else than from us here in Australia. That is a fact which I've verified.

I am now going to arrange for a new body part manufacturer to join us. They're much much cheaper than Rick (bear in mind , I didn't suggest Rick originally, he was suggested by Franchise5star to leevin).

These guys as Rick tells me produces copies of what he does in "cheap" Plastic. I can't verify that till I have a chat with them and their parts all come un-finished. However, the prices they suggest do make it more justifiable if something f**ks up.
Beeble tooned MY08 OEd. w/ RA BKit+SWheel

Cosworth Panel Filter w/ RA Intake | SuperCircuit 4-2-1 Headers | Creat’d Ti-tipped SS exhaust

BC BR-type Coilovers | UR + Whiteline Bars

EBC GreenStuff Pads | RDA Rotors

Dummer

Postby Dummer » Mon May 25, 2009 10:40 am

I used plastic primer on the c lip but the can says and so I've been told in the past just to sand, clean and then paint an already painted surface and no need for a primer as my understanding is that primers are for preparing unpainted surfaces??

I did a test fit before cutting and it looked like it would fit, but because of the vents it's impossible to tell for sure until the vent gaps are cut from the bumper...

I've uploaded some photos from my phone onto facebook if u want to take a look (in mobile uploads album)!

Thanks for emailing rick and I guess well see what he has to say!!

User avatar
Ozie
INACTIVE Member Account
Posts: 5445
Joined: Mon Sep 22, 2008 7:00 am
Location: Sydney, NSW, Australia

Postby Ozie » Mon May 25, 2009 12:38 pm

hi ryan,
our bumpers were identical,

i had some issues with fitment but in the end it went on sweet.

did you cut the holes out big enough?
thats one of the issues i had.
you need to allow for the undersided contours of the bumper, they are deep.
and as i said, you need a little bit of silicon to make it stay on well.
the double sided tape wasn't enough.

i used G-Clamps to hold it all in place till it set.
i hope you can salvage it.

show some pics so i can see please mate.

Dummer

Postby Dummer » Mon May 25, 2009 3:02 pm

Yeah the holes are big enough, the problem is the lip at the top was holding the upper part of the Evo X nose away from the bumper and it wouldn't stick, coupled with the fact the fibre glass is quite rigid and won't really bend to the curvature of the bumper. I was going to use silicon but then I realised the piece was way too straight to be able to be held down by the tape and I dont have any suitable G clamps. Even still I think holding it down with G clamps shouldn't be needed as there is going to be constant strain on the silicon and I didn't think silicon was really that strong an adhesive and it'll eventually give way imo... If this was made correctly out of a flexible material and followed the bumper's contour then double sided tape would be more than adeqaute and there'd be no need for silicon just to hold it in place....

I think it's beyond the point of salvaging...

User avatar
Bandit
Lancer Legend
Lancer Legend
Posts: 1170
Joined: Tue Dec 09, 2008 8:56 am
Location: The People's Republic of Campbelltown

Postby Bandit » Wed May 27, 2009 1:52 pm

I finally got my centre lip painted and fitted!

It's raining here today so not the best pics but here is a before and after.

I reckon it's made the front look more finished and tough. It ended up with two screws in the bottom, auto grade 3M tape across the top and solastic white filler on the side gaps. Sadly, one side is slightly more stuck out than the other, but what can you do. The painter got a very close match with the body colour too I think - after two sands, two wet fillers and two primes......

Before:

Image

After:

Image

Thanks again to ofey for getting them in for us!

User avatar
ofey
Alumni
Alumni
Posts: 8582
Joined: Mon Oct 27, 2008 8:56 pm
Location: Melbourne, VIC, Australia
Contact:

Postby ofey » Wed May 27, 2009 2:17 pm

Nicely done!

I would have gone with a black lip if I had a white one but I'm sure you preferred it all white.
Beeble tooned MY08 OEd. w/ RA BKit+SWheel

Cosworth Panel Filter w/ RA Intake | SuperCircuit 4-2-1 Headers | Creat’d Ti-tipped SS exhaust

BC BR-type Coilovers | UR + Whiteline Bars

EBC GreenStuff Pads | RDA Rotors

User avatar
Cordi
INACTIVE Member Account
Posts: 355
Joined: Thu May 07, 2009 2:00 pm
Location: Beaumont Hills (Hills District), Sydney NSW

Postby Cordi » Wed May 27, 2009 2:22 pm

looking really good man!! impressivee..

User avatar
Bandit
Lancer Legend
Lancer Legend
Posts: 1170
Joined: Tue Dec 09, 2008 8:56 am
Location: The People's Republic of Campbelltown

Postby Bandit » Wed May 27, 2009 2:23 pm

ofey wrote:I would have gone with a black lip if I had a white one but I'm sure you preferred it all white.

I would have kept it black had I a blacked out centre - but I am attached to the white these days. Looks like it's finished at the front now.

Thanks again for your help.

User avatar
Ozie
INACTIVE Member Account
Posts: 5445
Joined: Mon Sep 22, 2008 7:00 am
Location: Sydney, NSW, Australia

Postby Ozie » Fri May 29, 2009 6:58 pm

looks great Andrew. +1

I have finally finished installing my C-Lip..
it went on with ease...
i will post pics tomorrow....
Last edited by Ozie on Fri May 29, 2009 8:11 pm, edited 1 time in total.

User avatar
tadz0rz
Genius
Genius
Posts: 6955
Joined: Sun Mar 08, 2009 8:54 pm
Location: Melbourne, VIC, Australia
Contact:

Postby tadz0rz » Fri May 29, 2009 7:00 pm

Looking good bandit
Got a question? Read the ClubCJ Ultimate Guide First!!
Image
Just...Dont worry about it ;)Dont Click Me

dumb&

Postby dumb& » Fri May 29, 2009 8:06 pm

I should probably get around to putting mine on being that no one wants to buy it.

Means being without my car though...that I do not want!


Return to “Group Buys Service”

Who is online

Users browsing this forum: No registered users and 7 guests