|
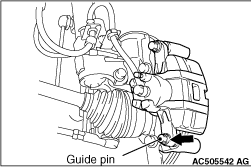
1.Remove the parts indicated in the figure, swivel the caliper body upward and retain it with a wire or similar tool.
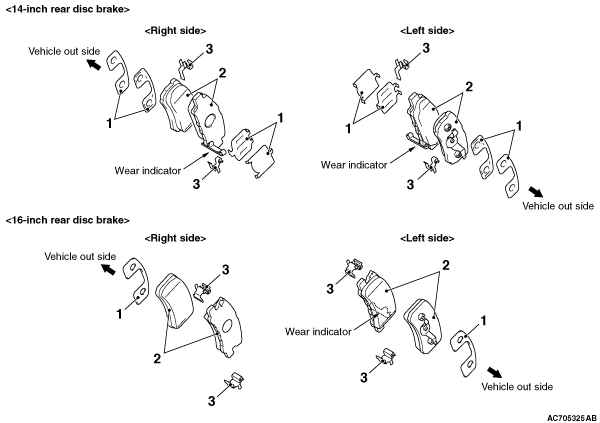
2.
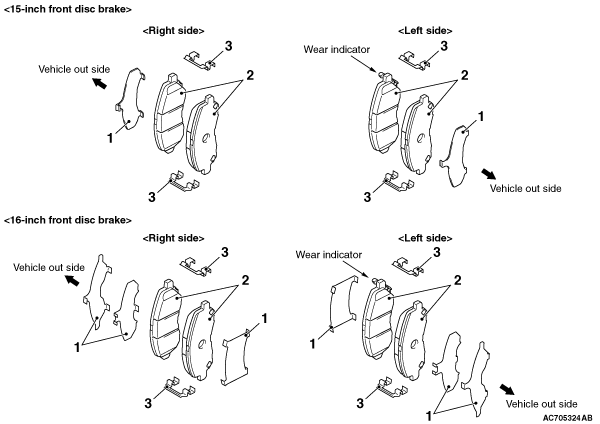
Remove the following parts from the caliper body.
(1)
Shim
(2)
Brake pad assembly
(3)
Clip
| note |
- The brake pad assembly with wear indicator is installed only to the inner side of the brake disc of the left-side brake at factory.
- As for the accessory pad set, the brake pad with wear indicator has been established to the inner side of the brake disc on both right and left.
|
|
|
3.
| caution |
Keep grease or other soiling off the pad and brake disc friction surfaces.
|
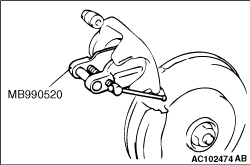
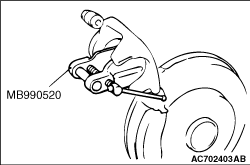
Clean the piston part, and press the piston into the cylinder using the piston expander (Special tool: MB990520).
4.Assemble the shim, brake pad assembly and clip to the caliper support, and tighten the guide pin to the specified torque.
Tightening torque: 44 ± 5 N·m
| note |
Install the brake pad assembly (with wear indicator) to the inner side of the brake disc, making sure that the wear indicator is located on the top.
|
|
|
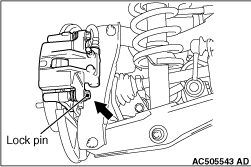
1.Remove the parts indicated in the figure, swivel the caliper body upward and retain it with a wire or similar tool.
2.
Remove the following parts from the caliper body.
(1)
Shim
(2)
Brake pad assembly
(3)
Clip
| note |
- The brake pad assembly with wear indicator is installed only to the inner side of the brake disc of the left-side brake at factory.<Except 14-inch rear disc brake>
- As for the accessory pad set, the brake pad with wear indicator has been established to the inner side of the brake disc on both right and left.
|
|
|
3.
| caution |
Keep grease or other soiling off the pad and brake disc friction surfaces.
|
Clean the piston part, and press the piston into the cylinder using the piston expander (Special tool: MB990520).
4.Assemble the shim, brake pad assembly and clip to the caliper support, and tighten the lock pin to the specified torque.
Tightening torque: 44 ± 5 N·m
| note |
Install the brake pad assembly (with wear indicator) to the inner side of the brake disc, making sure that the wear indicator is located on the bottom.
|
|
)
)
)
)
)
)
)
)